
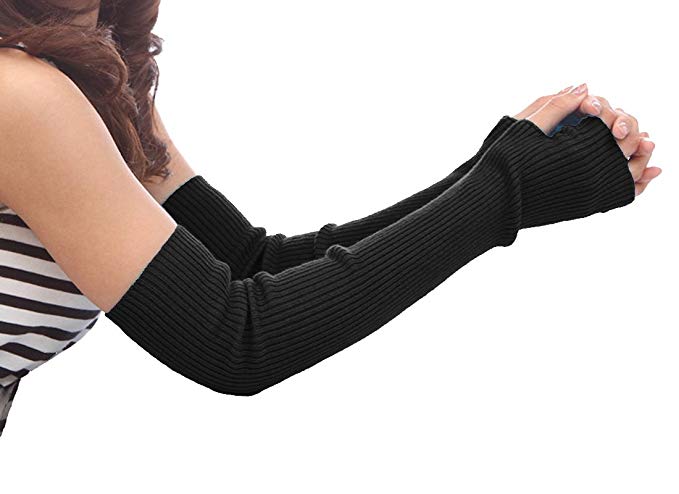
DIY Arm Shirt: Turn a Sweater into Stylish Arm Warmers
Arm Shirt Looking for a simple, cozy, and stylish DIY sewing project?
The perfect solution is to create your arm shirt—a pair of fashionable arm warmers from an old knitted sweater.
Inspired by Donna Karan’s Cashmere Collection, this project lets you turn a shirt into a dress into something beautiful and functional.
Whether staying warm during winter, heading to a dance class, jogging on a chilly morning, or looking for a handmade gift, this project is creative and practical.
Why Make an Arm Shirt?
An arm shirt isn’t just about warmth—it’s about comfort, movement, and style.
Unlike bulky sweaters, these warmers offer flexibility and freedom for your upper body while keeping your arms cozy.
They’re perfect for layering, making a fashion statement, or adding extra warmth under coats or over short sleeves.
Making your pair is also a fantastic way to breathe new life into an old knitted sweater.
Supplies Needed for Your Arm Shirt
To get started, you’ll need the following materials:
- 1 knitted sweater (preferably with snug-fitting sleeves)
- Seam ripper
- Scissors
- Pins
- Marking pencil or chalk
- Thread
- Sewing machine (with zigzag stitch or serger)
How to Sew an Arm Shirt
Creating your stylish arm warmers is easier than you think. Follow these step-by-step instructions to sew your very own pair.
Step 1: Remove the Sleeves
The sleeves are the foundation of this project. Use your seam ripper to carefully remove the sleeves from the armholes of the knitted sweater.
Take your time with this step to avoid damaging the fabric.
Once the sleeves are removed, set the rest of the sweater aside—you might find another creative use in a future project!
Step 2: Square the Edges
With the sleeves removed, the next step is to even out the top edges.
Cut off the sleeve caps so the edge is squared off. This creates a clean line and ensures a better finish when hemming the top.
Make sure both sleeves are the same length.
Step 3: Finish the Edges
To prevent fraying and add a professional touch, finish the raw edge of each sleeve using a serger or a zigzag stitch on your sewing machine.
After finishing the edges, fold back a 1/2 inch (1.27 cm) seam allowance to the wrong side of the fabric.
Pin in place, and then topstitch around the folded edge. This step gives your warmers a clean, polished look.
Step 4: Add a Thumb Slot (Optional)
One of the best features of this design is the optional thumb slot—it gives your arm warmers glove-like functionality.
- Using your marking pencil, measure and mark 2 inches (5.08 cm) from the hem of each sleeve cuff.
- This mark will be the starting point of your thumb slot.
- Using a buttonhole stitch, sew a 2-inch (5.08 cm) buttonhole from the marked point away from the cuff.
- Carefully open the buttonhole with your seam ripper to create the slot.
You now have a thumb opening that adds utility and comfort.
Styling and Wearing Your Arm Shirt
Once completed, the fun part begins—wearing your new warmers!
These cozy additions are incredibly versatile. Wear them with tank tops, T-shirts, or layered under coats.
They’re especially popular with dancers, runners, and anyone who enjoys stylish, functional layering.
Choose a sweater in a fun color or luxurious fabric like cashmere to make your creation extra special.
Tips for a Perfect Fit
- Choose a sweater that fits your arms snugly.
- Loose sleeves can make the warmers slip or bunch up.
- Ribbed cuffs work well since they naturally hug your wrists.
- For a neater thumb slot, use a buttonhole foot on your sewing machine.
- Match your thread color to the sweater for an invisible finish, or go bold for a pop of contrast.
Gift Your Arm Shirt
A handmade pair of arm warmers makes a thoughtful and stylish gift.
It’s a unique present that shows creativity and care.
Make a few different colors and fabrics for your friends, or keep extras around for cozy winter days.
Conclusion
Making your arm shirt is a fun and rewarding DIY project.
With just a few materials and some basic sewing skills, you can turn an old sweater into a functional, stylish accessory.
Whether you’re keeping warm, dancing, running, or gifting, your handmade creation will become a go-to favorite in your wardrobe.
So grab that old sweater and get started—you’ll be amazed at how easy and enjoyable it is to create your pair of warmers.